Soundproofing Tips for Music Producers: Make Your Home Studio Sound Better
September 28, 2023 / Anton Berner
Credit: Sonic Sounds/Unsplash
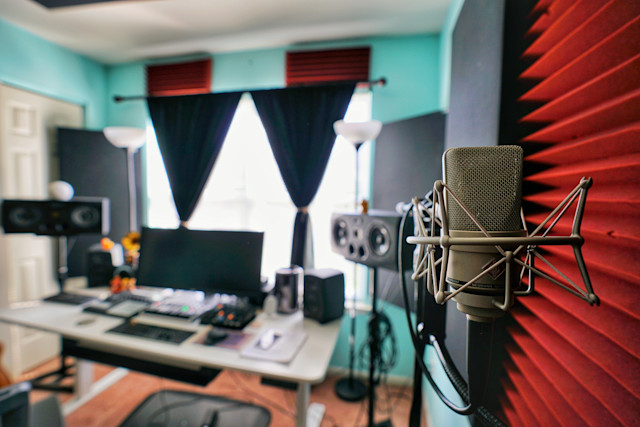
In this blog post, we will take you through the process of achieving quality recordings by soundproofing and acoustically treating your home studio — without bleeding out your pockets.
To achieve great quality sound recordings at home, you will also need to have the correct recording equipment for a bedroom studio setup. With that being said, soundproofing and sound-absorbing your recording space can make a world of difference in the quality of your music.
Below, you will find some invaluable tips on how to make your recording studio and mixing station sound a lot better, without breaking the bank.
Soundproofing and acoustic treatment in music recording studios
Soundproofing and acoustic treatment play crucial roles in music recording studios. If done correctly, it can make the difference between professional and amateur-sounding music. The terms are sometimes used interchangeably, but there is a difference between the two.
Soundproofing
Soundproofing is like the studio's shield, keeping external noise out and ensuring that your music doesn't bother the neighbors. It's all about maintaining privacy and preventing unwanted disturbances. You don’t want your best takes ruined by outside traffic noise or your neighbors slamming their doors.
Acoustic treatment
On the other hand, acoustic treatment is like the studio's audio engineer, shaping the internal sound environment. It deals with managing echoes, refining sound reflections, and creating an ideal acoustic space for recording.
If you’ve ever been in a room without furniture, you’ve probably noticed that your voice sounds metallic and gives off a slight echo when you speak. This is not great for recording audio.
You want the audio recording to be as true (or dry) to the original signal as possible. This makes it easier to achieve your desired sound in the mixing stage. Treating the acoustics in your room helps with keeping your recording signals dry and clean.
So, while soundproofing protects your space from letting sound in and out, acoustic treatment fine-tunes it to make sure your music sounds its best when the recording begins. Together, they form the foundation for a professional recording setup.

Treating the acoustics in your room helps with keeping your recording signals dry and clean.
Why should you soundproof and treat your recording space?
Well, it all comes down to achieving top-notch audio quality in your recordings. Soundproofing ensures that you capture only the sounds you want, free from external disturbances.
Acoustic treatment enhances the quality of the sounds within your space by absorbing audio and keeping it from bouncing around and reflecting. It helps to eliminate unwanted echoes, reduces reverberation, and creates a controlled environment where you can fine-tune your music with precision.
Treating your room for acoustics will also help you to create better mixes. If the music coming from your studio monitors bounces around in the room, it will be hard to decipher what frequencies you need to fine-tune or if all the tracks are balanced in your song.
Together, soundproofing and acoustic treatment create the ideal conditions for producing professional-grade recordings that sound crisp, clear, and truly impressive.
Pick the optimal space in your home
When setting up your home recording studio, selecting the right space is of high importance. Optimal space selection can significantly impact the success of your soundproofing and acoustic treatment efforts.
Start by choosing a room that's furthest away from noisy areas like busy streets or household appliances. Ideally, a room with minimal external noise intrusion is your best bet.
Consider the room's size too; larger spaces may require more acoustic treatment to control sound reflections effectively, while smaller rooms can sometimes offer natural sound advantages.
If the room is too small, however, it will be difficult to monitor your project because audio needs space to breathe in. Rule of thumb: Your living room is probably too large and your closet is probably too small.
The shape of your room also plays a part. An ideal studio space is rectangular, like most rooms are, luckily. But a square room is often times better than a long, rectangular one.
Additionally, look for a room with minimal windows and irregular wall shapes, as these can be sound control challenges. Ultimately, finding the right space is the first step in creating a recording environment that sets you up for success.
Mind the placement of your recording station
Once you've chosen the ideal room for your home recording studio, the next critical step is to mind the placement of your recording station within that space.
Your desk, where your computer and monitors sit, is best positioned against the shortest wall of the room if your room is rectangular. Keep your studio monitors a few inches from the wall and slightly angled toward your seat so that you form a triangle with them when you sit down. This will allow you to monitor your recordings as accurately as possible.
Your microphone, instruments, and recording equipment should also be strategically positioned to maximize sound quality.
Avoid placing your recording equipment near walls with large, flat surfaces to minimize sound reflections and echoes. Instead, consider setting up your equipment in the center of the room, or in a corner that has sound absorbents on the walls.
Experiment with different configurations to find the optimal arrangement that minimizes unwanted noise and resonances while ensuring your recording area is comfortable and functional. Keep in mind that the proper placement can significantly enhance the quality of your recordings.

Proper equipment placement can significantly enhance the quality of your recordings
Place your studio monitors on foam pads
When your desk space is set up, don't forget to place your studio monitors on foam pads. This simple step can make a big difference in your sound quality when you’re referencing your recordings.
Foam pads, often called isolation pads or monitor isolation stands, serve two important purposes. Firstly, they decouple your monitors from the surface they're resting on, which prevents vibrations from being transmitted to the desk or stand. This isolation reduces the potential for unwanted resonance and coloration in your audio playback.
Secondly, foam pads help control the dispersion of sound waves, directing them more accurately toward your listening position. This results in a more precise and balanced audio experience, allowing you to make better mixing and recording decisions. So, invest in some quality foam pads to optimize your studio monitor setup and elevate your sound quality.
Use a thick carpet or rug to cover the floor
Another effective way to enhance the acoustics of your home recording studio is by using a thick carpet or rug to cover the floor. This simple addition can have a significant impact on reducing sound reflections and controlling reverberation within your recording space.
Carpets and rugs act as sound absorbers, soaking up some of the sound energy that would otherwise bounce off hard surfaces like bare floors.
Choose a carpet or rug with a dense pile and a good thickness to maximize its sound-absorbing properties. Place it strategically in the room, especially in areas where you record or listen to playback. This can help reduce unwanted reflections and create a more controlled acoustic environment.
Another trick is to hang carpets on the wall. This too works as acoustic treatment, though maybe not as well as acoustic panels.
Pick sound-absorbing curtains
Consider selecting sound-absorbing curtains for your windows. These specialized curtains are designed to reduce external noise infiltration and control sound reflections within the room.
Investing in sound-absorbing curtains not only improves the sound quality of your recordings but also adds a practical and stylish element to your studio's decor.
Use weather strippings on doors and windows
Weatherstripping is an effective way to seal gaps and prevent sound leaks, making it an essential addition to your studio setup.
Start by inspecting all doors and windows in your studio space. Look for any gaps or spaces where sound could enter or escape. Apply weatherstripping along the edges of doors and windows to create a tight seal when they're closed.
There are various types of weatherstripping available, including adhesive-backed foam tape, door sweeps, and silicone-based sealants. Choose the option that best suits your specific needs and the size of the gaps you want to seal.
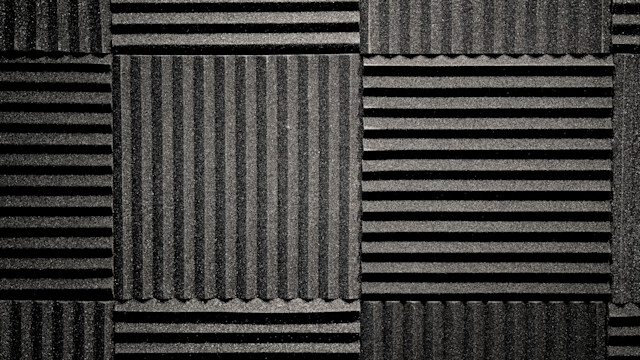
Covering your walls with sound-absorbing materials can significantly improve your sound quality.
Use bass traps to reduce buildups and resonance
Bass traps are specialized acoustic treatment devices designed to address low-frequency issues, such as excessive bass buildup and resonance.
Place bass traps strategically in corners of your studio, as corners tend to be hotspots for low-frequency issues. These traps work by absorbing and diffusing bass frequencies, which helps to reduce the pronounced resonance and muddiness that can occur in untreated spaces. This results in a more balanced and accurate representation of your audio recordings.
Eliminate vibrations from loose material
To maintain the pristine audio quality in your home recording studio, it's crucial to eliminate vibrations caused by loose materials within the room. Vibrations can interfere with your recordings and introduce unwanted noise.
Make sure you secure loose objects, such as cables, mic stands, paintings, or equipment. This is to prevent objects to rattle or vibrate during recording sessions.
Use a microphone reflection filter for vocals
To capture pristine vocal recordings in your home studio, consider using a microphone reflection filter, often referred to as a "vocal booth" or "portable vocal isolation shield."
This handy tool can significantly improve the sound quality of your vocal recordings by minimizing unwanted reflections and ambient noise.
Simply attach the microphone reflection filter to your microphone stand and position it around your microphone. This shield features specialized acoustic materials that absorb and diffuse sound waves coming from various directions, effectively reducing room reflections and noise.
As a result, you can achieve more focused and professional-sounding vocals without the need for a dedicated soundproofed vocal booth.

Achieve professional-sounding vocals with a reflection filter. (Cred: Will Spirit/Unsplash)
Step-by-step summary
So, wrapping up! If you want to achieve professional-quality audio recording in your home studio:
Start by selecting an ideal, quiet room and placing your equipment strategically.
Use soundproofing techniques such as weatherstripping doors and windows, covering the floor with thick carpets, and utilizing sound-absorbing curtains.
Additionally, employ sound-absorbing materials and bass traps on the walls, corners, and ceilings to control reflections and low-frequency issues.
Eliminate vibrations from loose objects and utilize isolation pads for equipment.
For vocals, employ a microphone reflection filter to minimize room reflections and ambient noise.
By combining these tips, you'll create a well-tuned recording space that enhances sound quality, making your music recordings shine.
About the author
Anton Berner is a music producer, audio engineer, and songwriter from Stockholm, Sweden. He's produced hip-hop & rap music since the early 2000s and his expertise is in vocal mixing and sample-based beat production. Anton is also the SEO & Content Manager @ Soundtrap and manages the blog and newsroom.
Get started with Soundtrap today!